
Hey there fellow road warriors! If you’ve ever stood at a dump station wondering which handle to pull first or why your sewer hose smells like last week’s chili, you’re not alone. I’m just a regular camper like you, and today I’m laying out the real-world, no-nonsense way to empty your RV waste tanks without turning it into a horror show.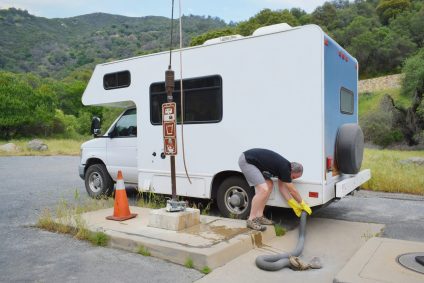
🧤 Step 1: Gear Up Like a Pro (or at Least Like Someone Who Doesn’t Want to Touch Poop)
- Gloves: Disposable or reusable rubber gloves are a must. Trust me, you’ll thank yourself later.
- Sewer hose: Make sure it’s in good shape—no cracks, no leaks.
- Clear elbow connector: Optional, but it lets you see when things are flowing (and when they’re done).
- Sewer hose support: Keeps the hose sloped so gravity does the dirty work.
🚽 Step 2: Black Tank First, Always
- Connect your sewer hose to the RV outlet and the dump station.
- Open the black tank valve slowly. Let it drain completely.
- If you’ve got a tank flush system, now’s the time to use it. If not, pour a few gallons of water down the toilet and drain again.
- Close the valve once it’s done.
🚿 Step 3: Gray Tank Second, Like a Rinse Cycle
- Open the gray tank valve. This water is from your sinks and shower and helps flush out the sewer hose.
- Let it drain completely, then close the valve.
- If your RV is equipped with a Galley tank also, now is the time to open that valve and let it drain completely.
🧼 Step 4: Clean Up and Store It Right
- Disconnect the hose from the RV first, then the dump station.
- Rinse the hose if there’s a water source nearby.
- Cap both ends and store it in a separate compartment (not next to your fresh water hose—ew).
💡 Bonus Tips from the Campground
- Never leave your black tank valve open at full-hookup sites. You’ll end up with the dreaded “poop pyramid.”
- Use RV-safe toilet paper and tank treatments to keep things flowing.
- If your tank sensors are acting up, toss in some ice cubes before a drive—they help scrub the inside.